

After writing my very first Selenium test with xUnit, now I can dive into different methods of finding elements on the page.
You can locate an element/elements with FindElement/FindElements methods by different properties of an element such as ID, Name, Class, XPath, CSS Selectors, link Text, etc. FindElement method returns the first matching element on the page. If there is no element that matches with the given locator than it throws “element not found” exception.
The important thing to be careful with element locator is to make sure the property you use is unique, so you don’t find the wrong element on the page. If there are multiple elements that has the same locator, there is a possibility that the element that FindElement method returns is not the one that you are looking for. And it can make your test case flaky.
Ideally element ID should be unique per element however life is not perfect. You can find yourself trying to test a page with web elements without IDs, multiple web elements with same IDs or multiple web elements with exact same Class Names and properties. So knowing different ways of locating an element might be helpful sometimes.
Today I’ll find elements on https://demoqa.com/html-contact-form/ page with using different types of locators an fill out the form and submit it.
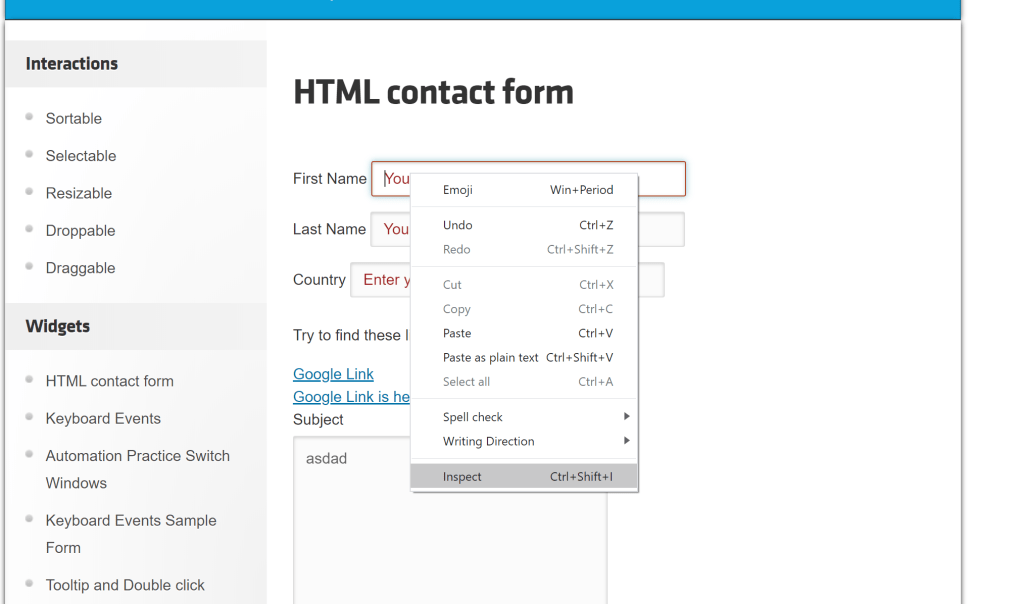
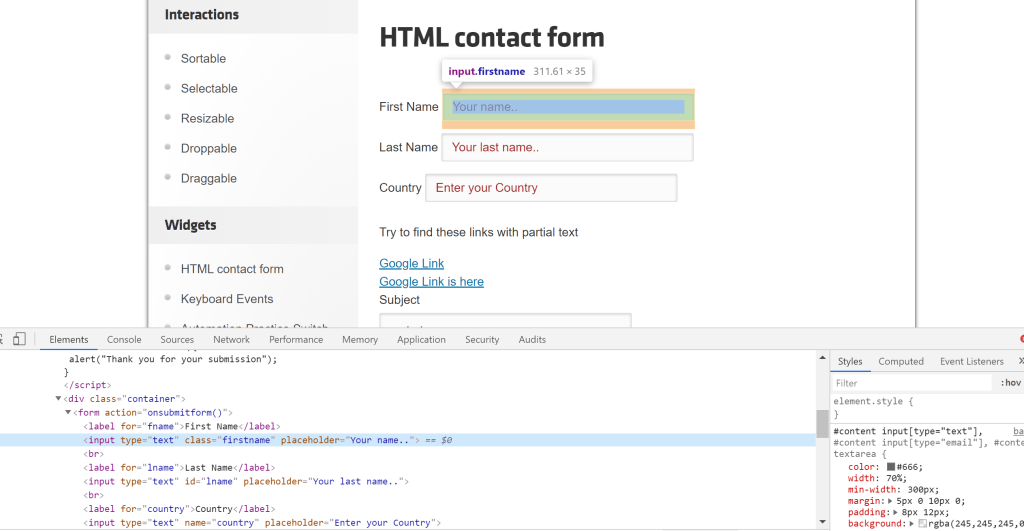
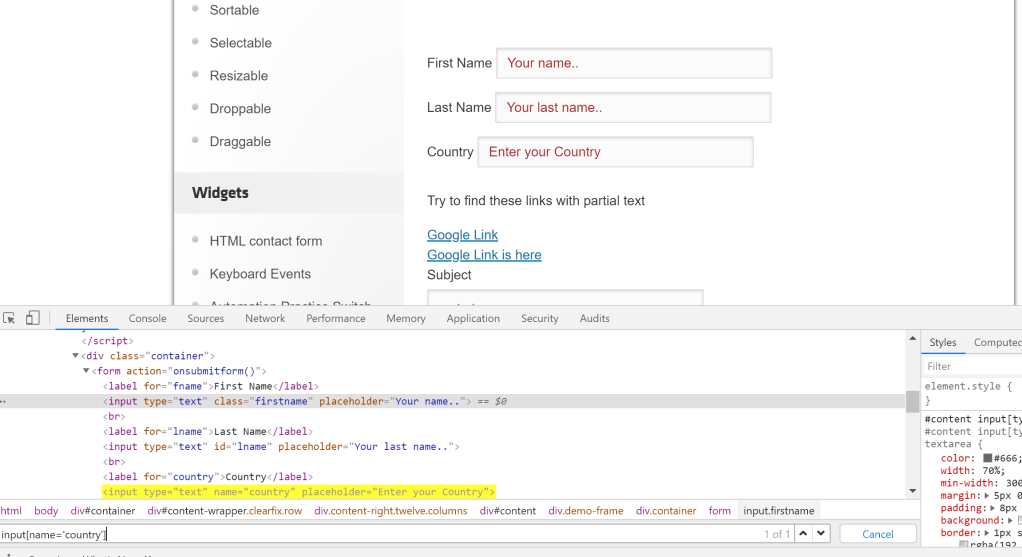
First I’ll go the page I want to test, right click on the element I want to find and click inspect. This will open the Chrome Dev Tool window and show the element in HTML DOM.
Here is my test case. You can see that I use ID, Class Name, CssSelector, Partial Link Text and Xpath to locate elements on the page.
using System;
using System.Collections.Generic;
using System.Text;
using Xunit;
using OpenQA.Selenium;
using OpenQA.Selenium.Chrome;

namespace SeleniumWithXUnit
{
    public class HtmlContactFormTests
    {
        public IWebDriver driver;

        [Fact]
        public void FindElementsWithDifferentTypesOfLocators()
        {
            //Initialise Chrome Driver
            driver = new ChromeDriver();
            driver.Navigate().GoToUrl("https://demoqa.com/html-contact-form/");

            IWebElement firstName = driver.FindElement(By.ClassName("firstname"));
            firstName.SendKeys("Name");

            IWebElement lastName = driver.FindElement(By.Id("lname"));
            lastName.SendKeys("LastName");

            IWebElement countryField = driver.FindElement(By.CssSelector("input[name='country']"));
            countryField.SendKeys("United States");

            IWebElement firstLink = driver.FindElement(By.PartialLinkText("Google Link"));

            IWebElement secondLink = driver.FindElement(By.XPath("//a[text()='Google Link is here']"));

            IWebElement subject = driver.FindElement(By.Id("subject"));
            subject.SendKeys("Subject");

            IWebElement submitButton = driver.FindElement(By.CssSelector("Input[value='Submit']"));
            submitButton.Click();

            //Close chrome browser.
            driver.Quit();
        }
    }
}
You can test your locator in Chrome Dev Tools to see if it’s unique enough to get the element. If the search result is greater then ‘1’ than you may want to change your locator.
Tips: If you are new to UI test automation or even testing, you’ll soon find out soon the Dev Tool is your best friend. You can also open Dev Tool with F12.
These are some basic examples of finding elements. I would highly recommend learning more about CssSelector and Xpath locators. They can be pretty handy when you don’t have an obvious property or when you need to find a sibling or a parent element.
Here is a list of resources that I find really helpful to learn more about locators and more advance techniques.
